Vimix documentation

Community documentation of vimix, the video live mixer
Add a vimix documentation page
Contribute to vimix documentation on github with upload.
What it does
To contribute to vimix documentation on vimix-docs, first prepare your files following the instructions here. You can then upload them directly on github using a web browser.
The process requires that you have a github account and that you create a pull request. The rest is automatic.
How to
-
Fork vimix-docs repository.
Open vimix-docs in a web browser and make sure you are logged-in. Clic on
Forkto create a copy in your account: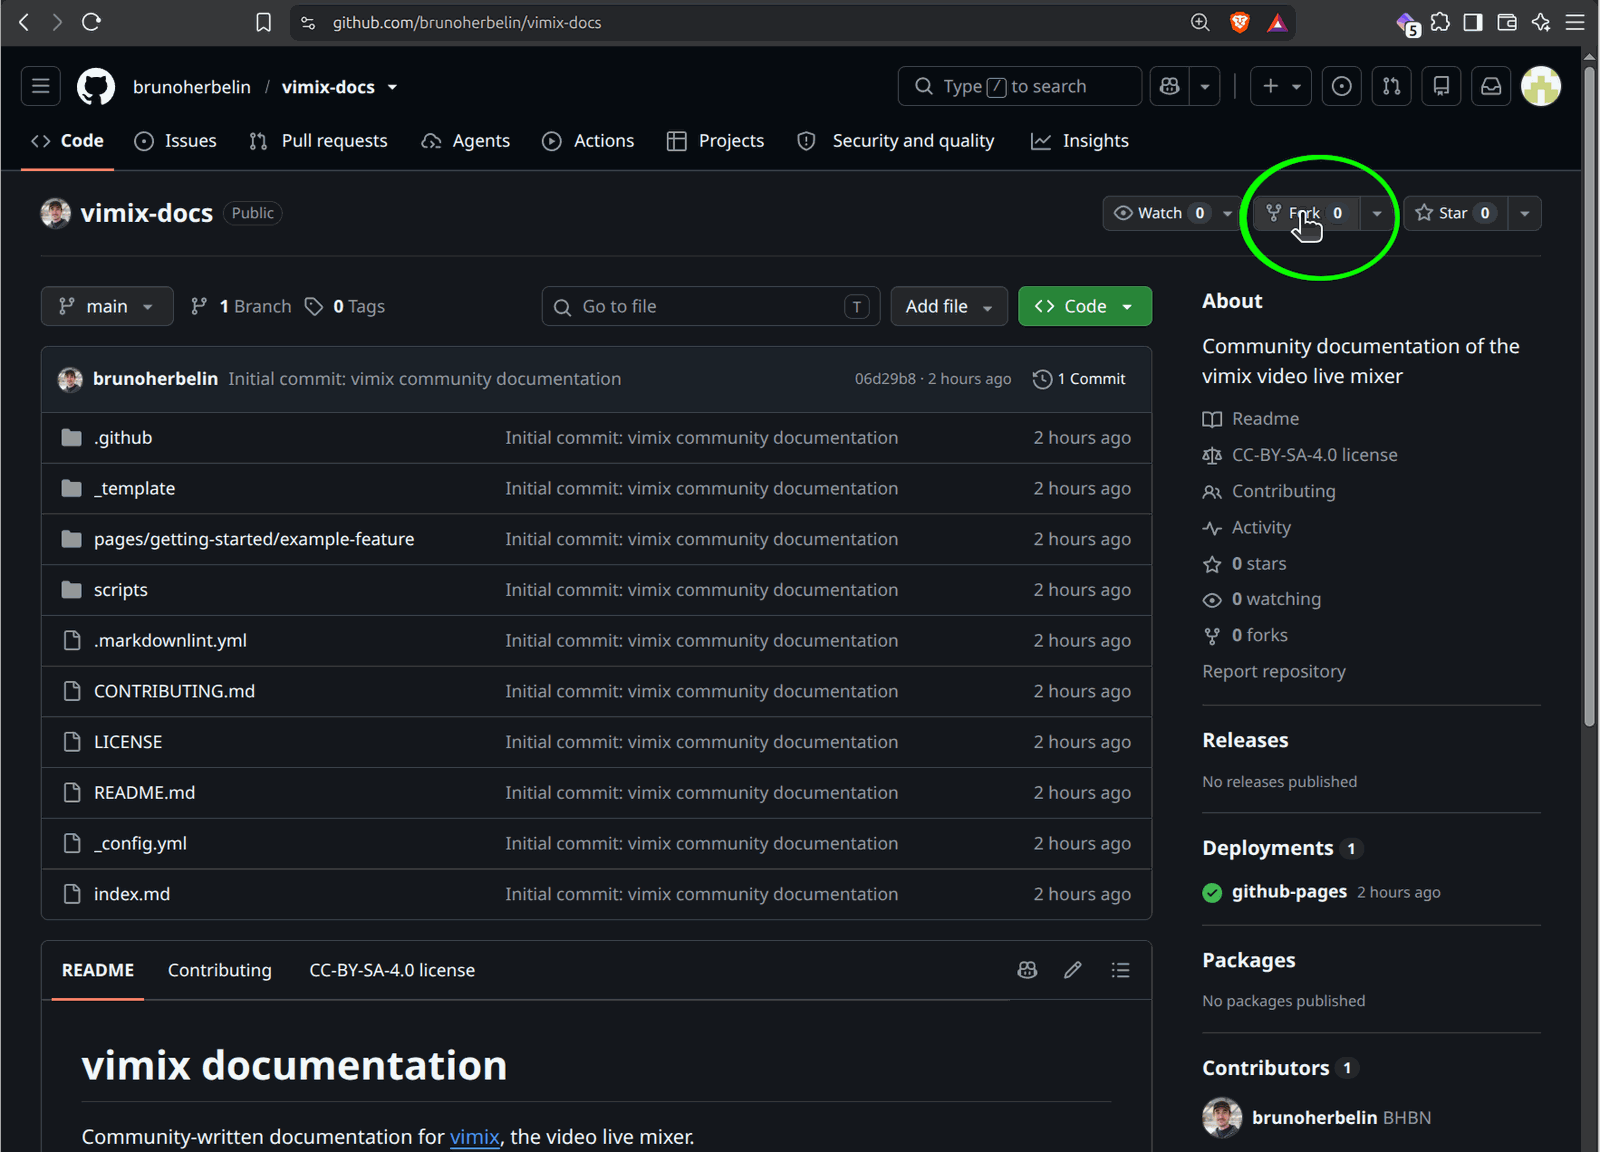
-
Validate the creation of the fork
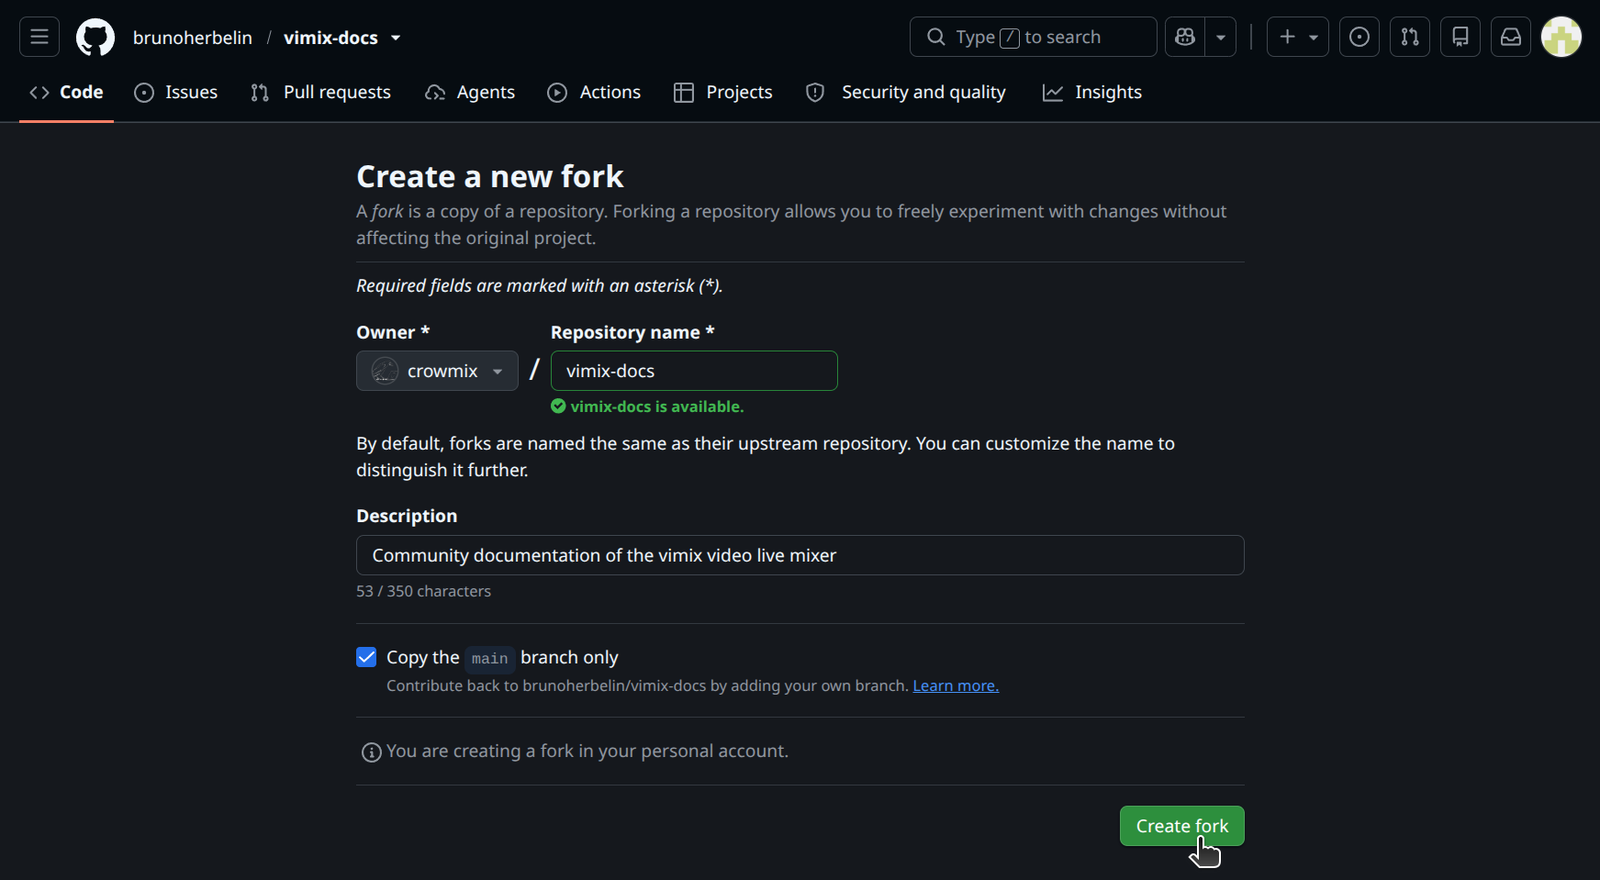
-
Inside your forked copy of
vimix-docs, navigate to thepagesfolder and choose toUpload Files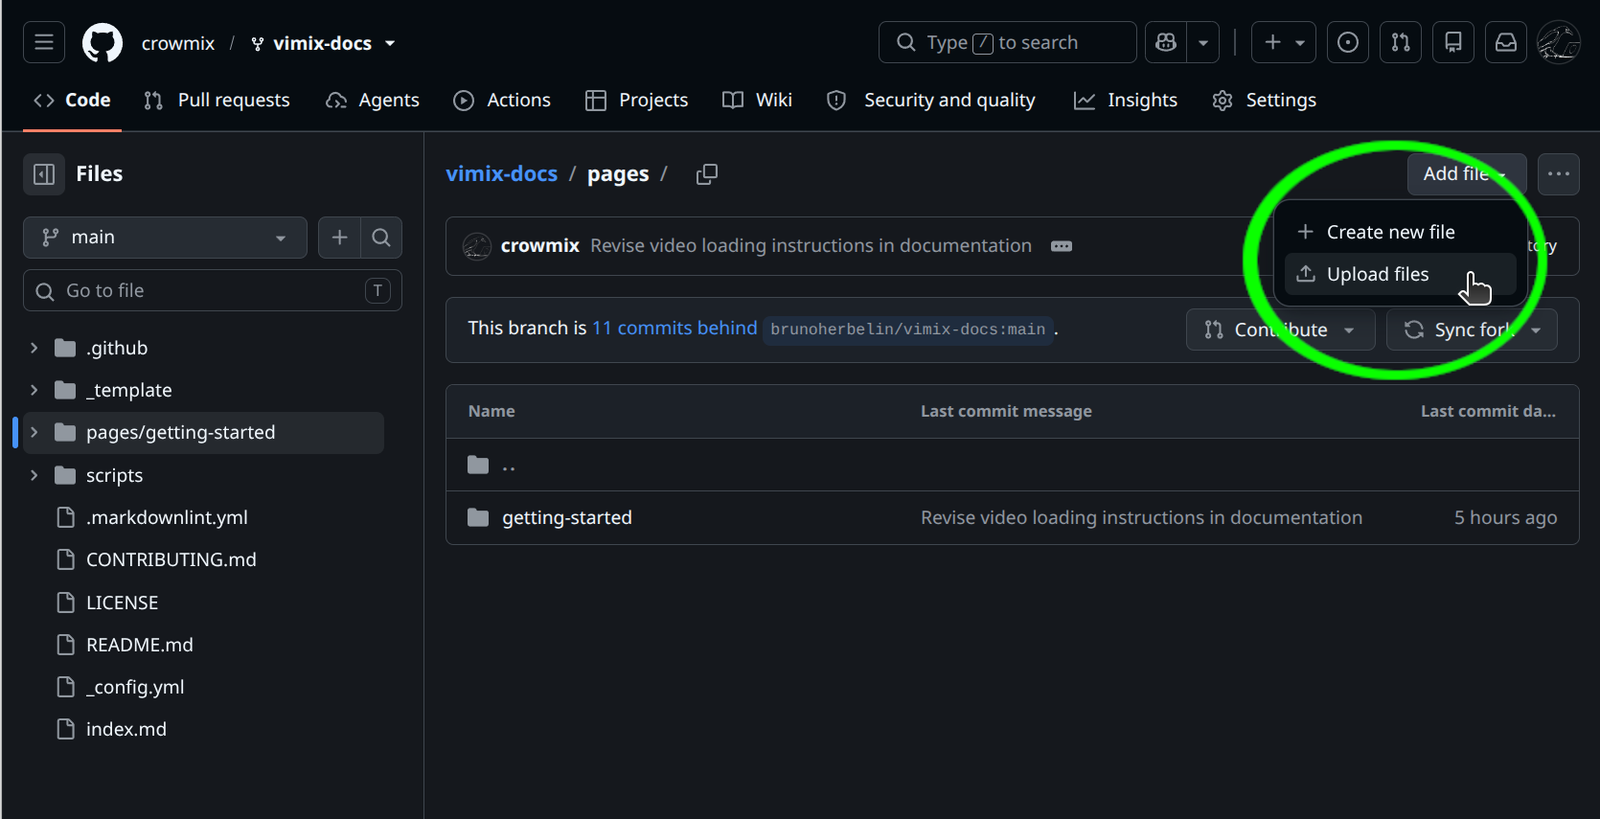
-
Drag & Drop the folder you prepared with the documentation and
Commit changes.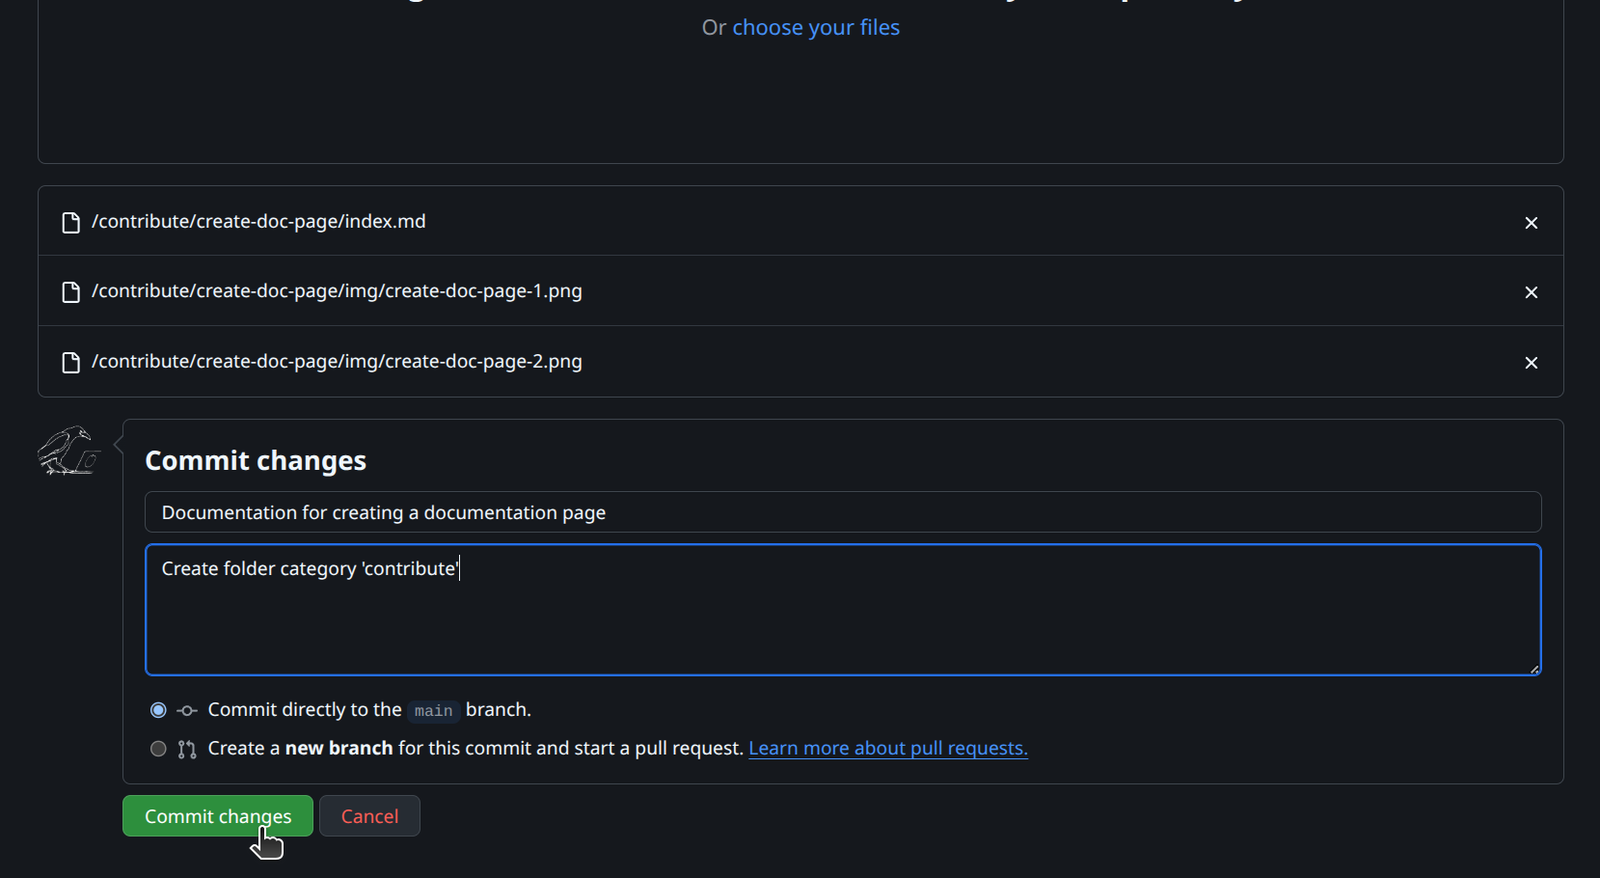
IMPORTANT. As explained here, vimix documentation is structured into folders for different categories. Category names are for instance
getting-started,sources,contribute, etc. You can use a category already existing or propose a new one (e.g., you could propose a categoryopen-sound-control). Follow the instructions here to create the documentation page and images and put them into a directory with a meaningful name. This folder should only contain oneindex.mdfile and animg/folder containing the screnshots inPNGformat.Example; for a documentation on “how to create a camera source” for the “getting started” category, you would prepare the following folders and files;
getting-started/
| --- create-camera-source/
|      | --- index.md
|      | --- img/
|             | --- screenshot-1.png
|             | --- screenshot-2.png
=> Drag the folder
getting-started/(= the category) into the githubvimix-docs/pages. Fill the commit information (Tile and description). -
Create a pull request
After your files are committed, go to
Pull requestsin the github menu bar (next to<> Code) and click onNew pull request.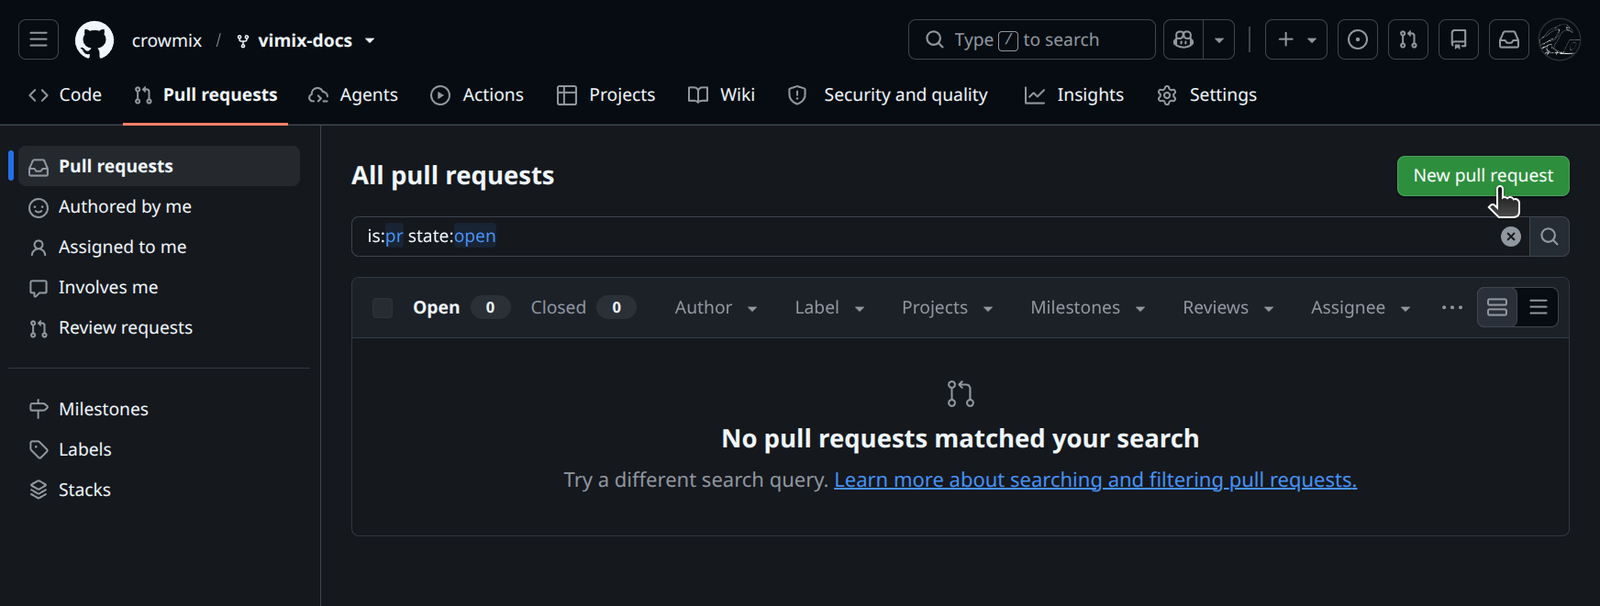
The system localizes the changes and new files that you added; you can now confirm and
Create pull request;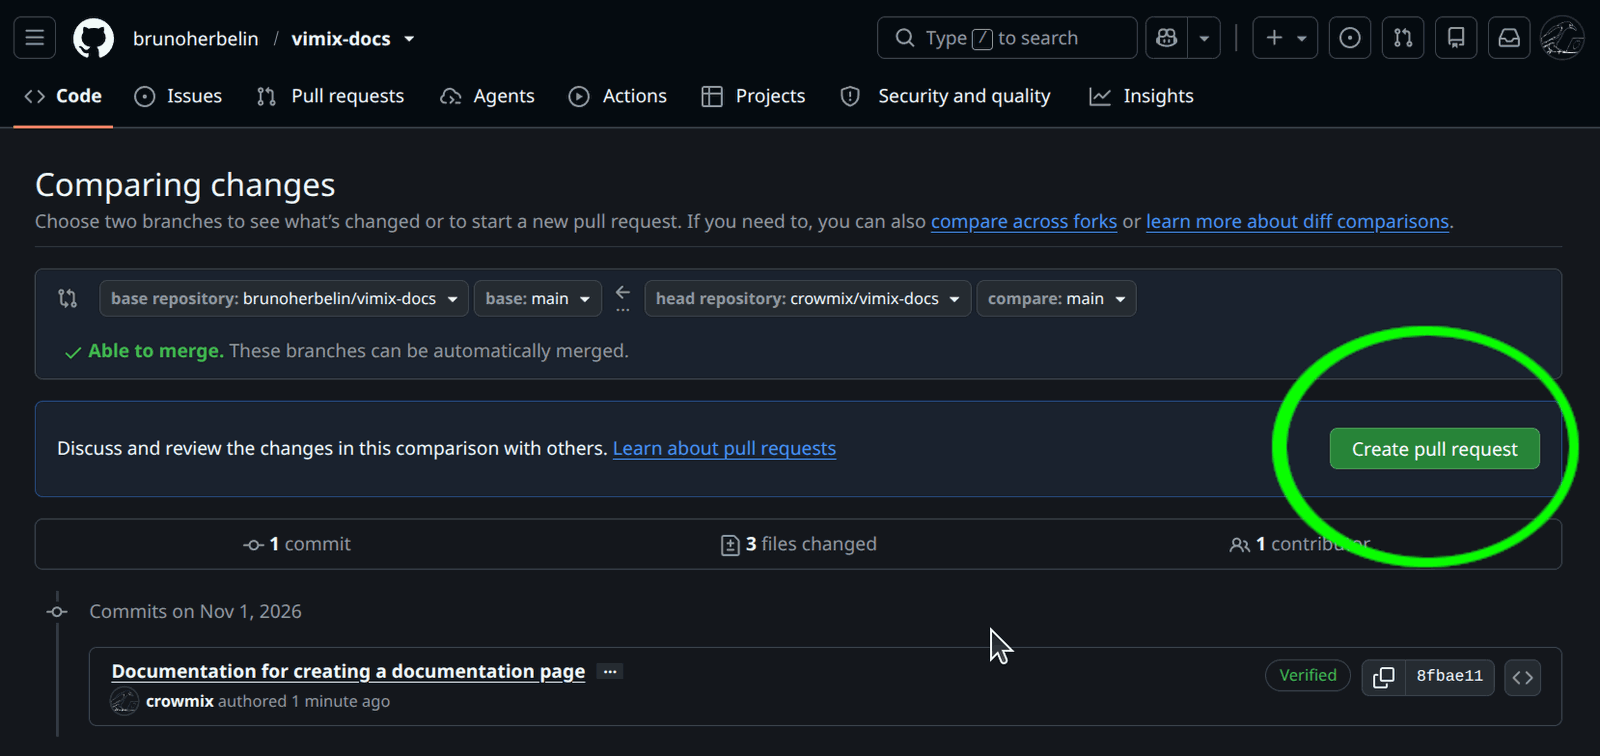
-
The pull request is being checked
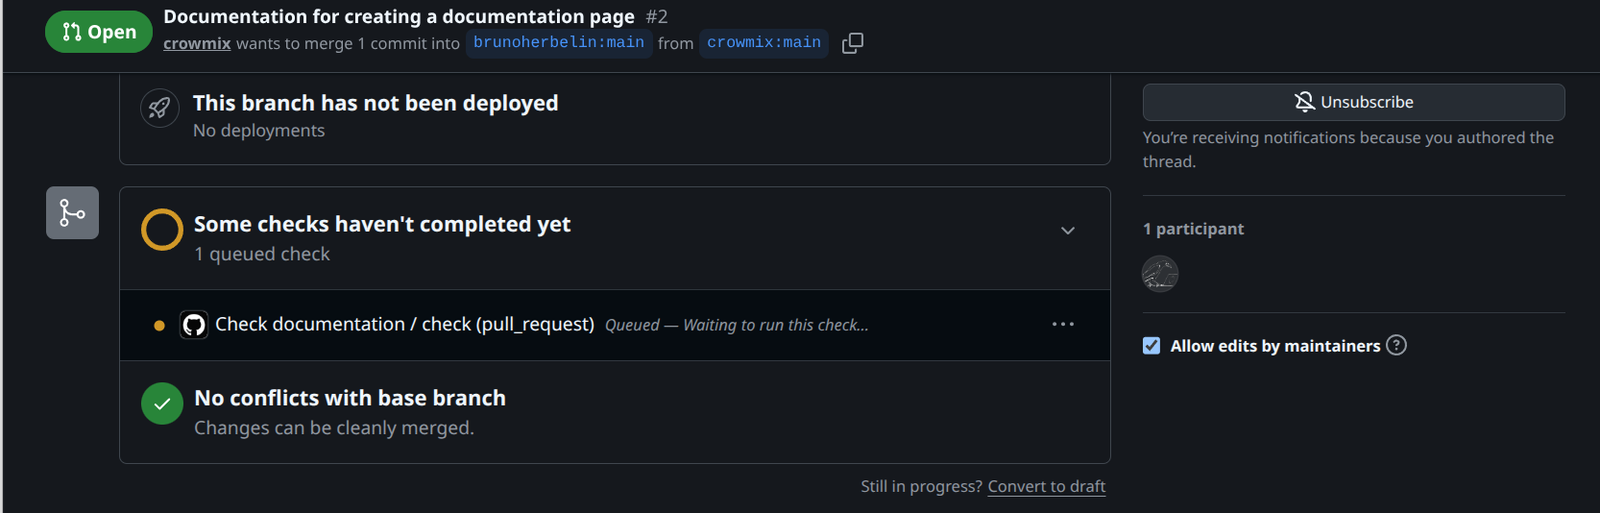
If validation fails, follow the errors indication to understand what was wrong. Close the pull-request and make changes to your commit to fix the problem. Re-open the pull request.
-
The pull request is valid
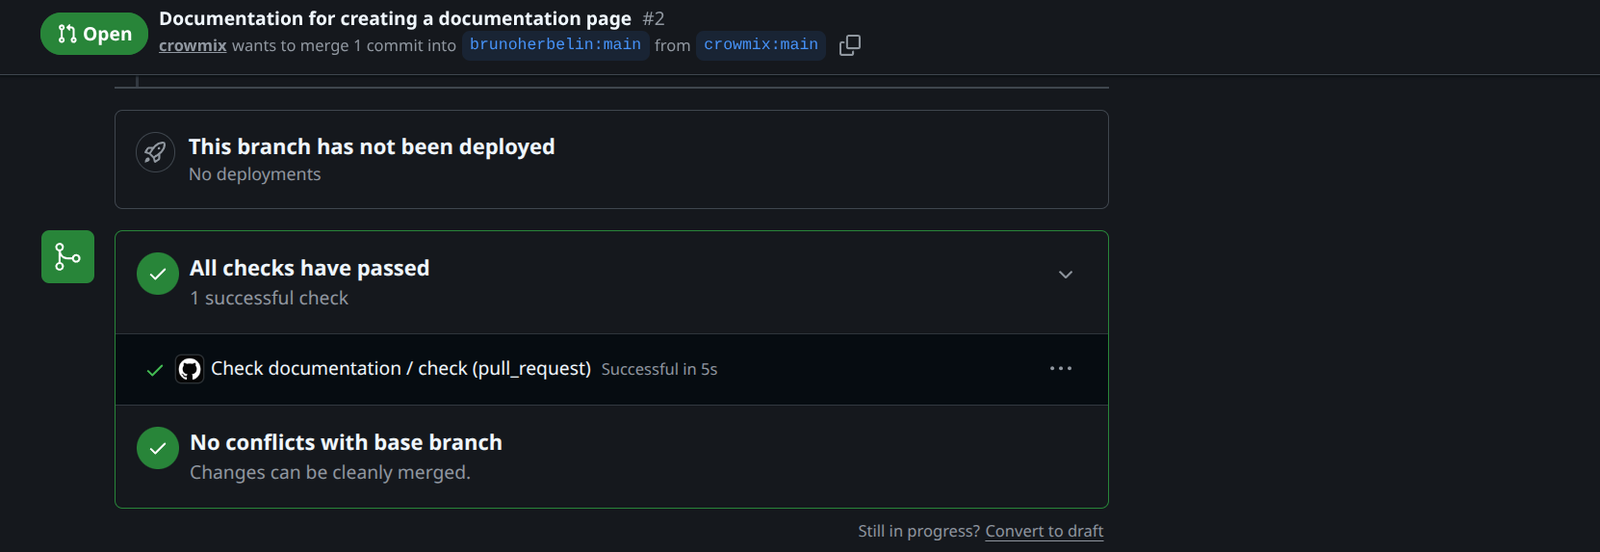
That’s all for you !
After validation, the pull-request will be accepted by vimix-docs maintainers. This can take some time depending on their availability.
Specific information
- This documentation page is for users more familiar with web-browser interface than using command lines; the same process can be done with git. See vimix-docs website for more info.
- There is no shame in asking help of an AI agent for this github procedure ;)
- Related page : Create a vimix documentation page