Vimix documentation

Community documentation of vimix, the video live mixer
Create a vimix documentation page
Contribute to vimix documentation using vimix annotated screenshots.
What it does
Prepare a page for the Community documentation of vimix with screenshots and a Markdown index file.
The files are then ready to be proposed to the vimix-docs repository following these instructions.
How to
-
Take screenshots with annotations using the
Guru toolboxof vimix.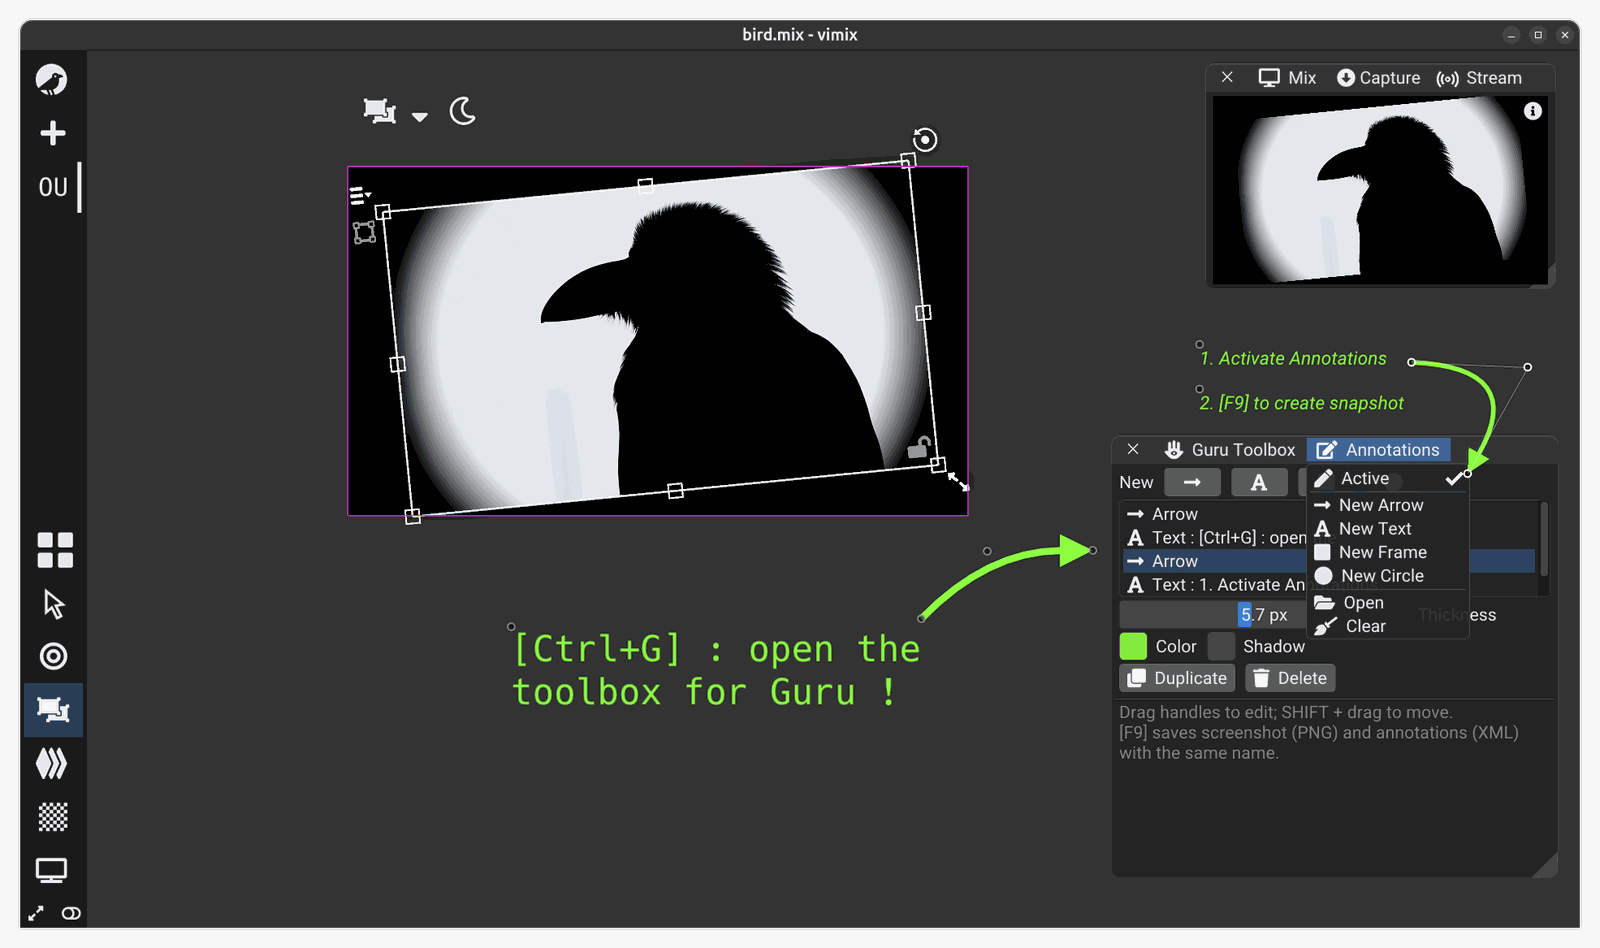
-
Launch Vimix and prepare for a screenshot for the feature you want to describe.
-
Open the
Guru toolboxof vimix with[Ctrl+G]. ActivateAnnotations. -
Add overlay Arrows, Texts, Rectangles or Circles on top of Vimix user interface to illustrate the user action. Move and adjust them using the dots and the parameters.
-
Take a screenshot from
Guru toolbox/Screenshot vimixor by pressing[F9]key. The screenshotpngfile is saved in your home directory.
-
-
Create a text file
index.mdbased on the templateDownload the template index.md.
-
Copy all screenshots in a directory
img\next toindex.md -
Open
index.mdin a text editor.Here is an example with Zed editor
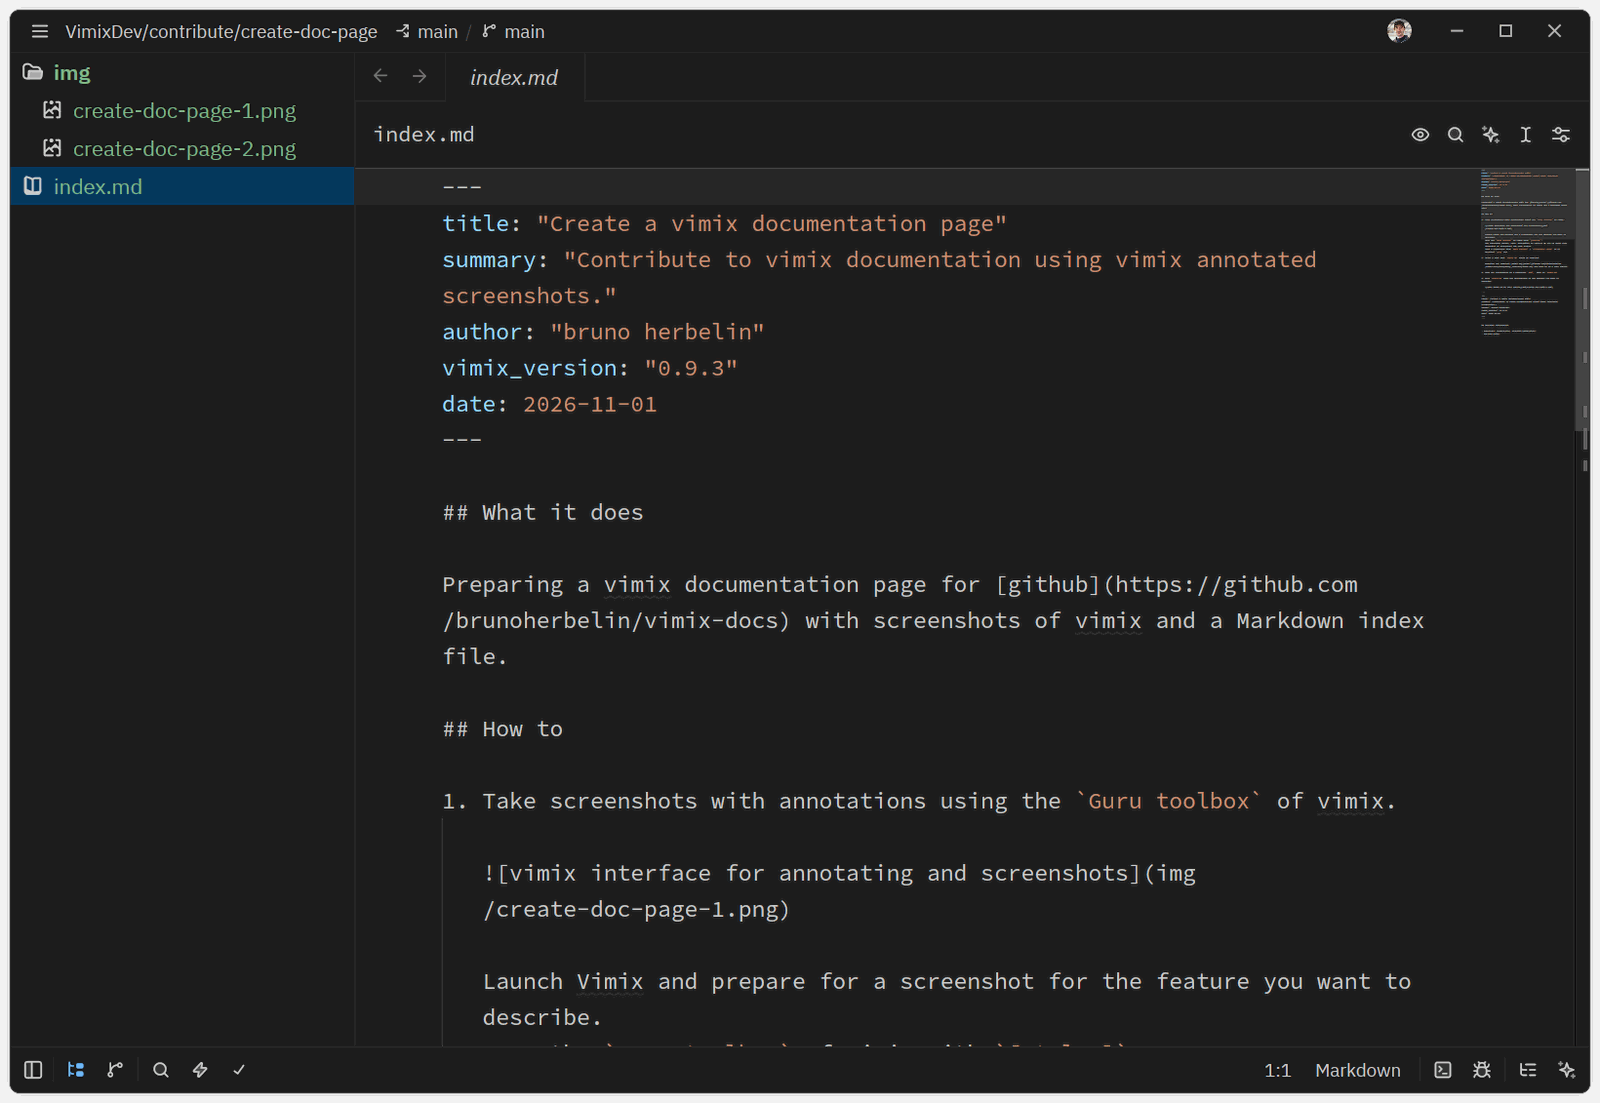
-
Fill
index.mdwith the description of the feature you want to describe.- Follow the template and provide required meta information;
---
title: "Feature name"
summary: "One sentence describing what this feature does."
author: "Your name or GitHub handle"
vimix_version: "0.9.3"
date: 2026-11-01
---
- Give a short description of the feature;
## What it does

Two to four sentences explaining the feature and when to use it.
- Give a step by step instruction, referencing the screenshots that you prepared earlier. It is important to provide alternative text describing the screenshot;
## How to
1. Describe the first user action.

2. Describe the second user action.

## Specific information
- Shortcuts, limitations, platform differences.
- Related pages.
Specific information
- Read the contribution instructions.
- When saving a screenshot, vimix also saves a description of the annotation (
.xml); you can keep and re-use these files. They can be deleted when you don’t need them anymore. - The screenshot filenames are given with their relative path to the
img/folder ; e.g., as in.